Set up your attendance app, step by step.
Follow these pictures in order. You will create your Sheet, connect Apps Script, add staff, and get the app ready to use.
Everything is guided
You only need a Google account. Your Sheet remains yours and stores all attendance data. Take one step at a time—there is nothing technical to install.
Create your Google Sheet
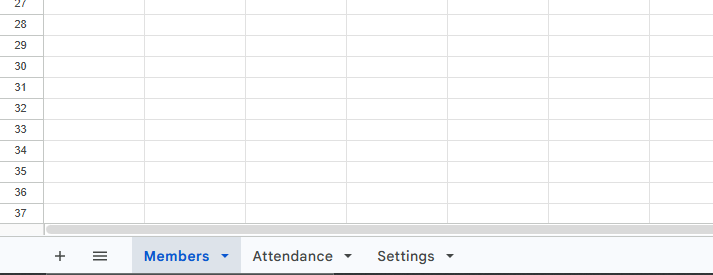
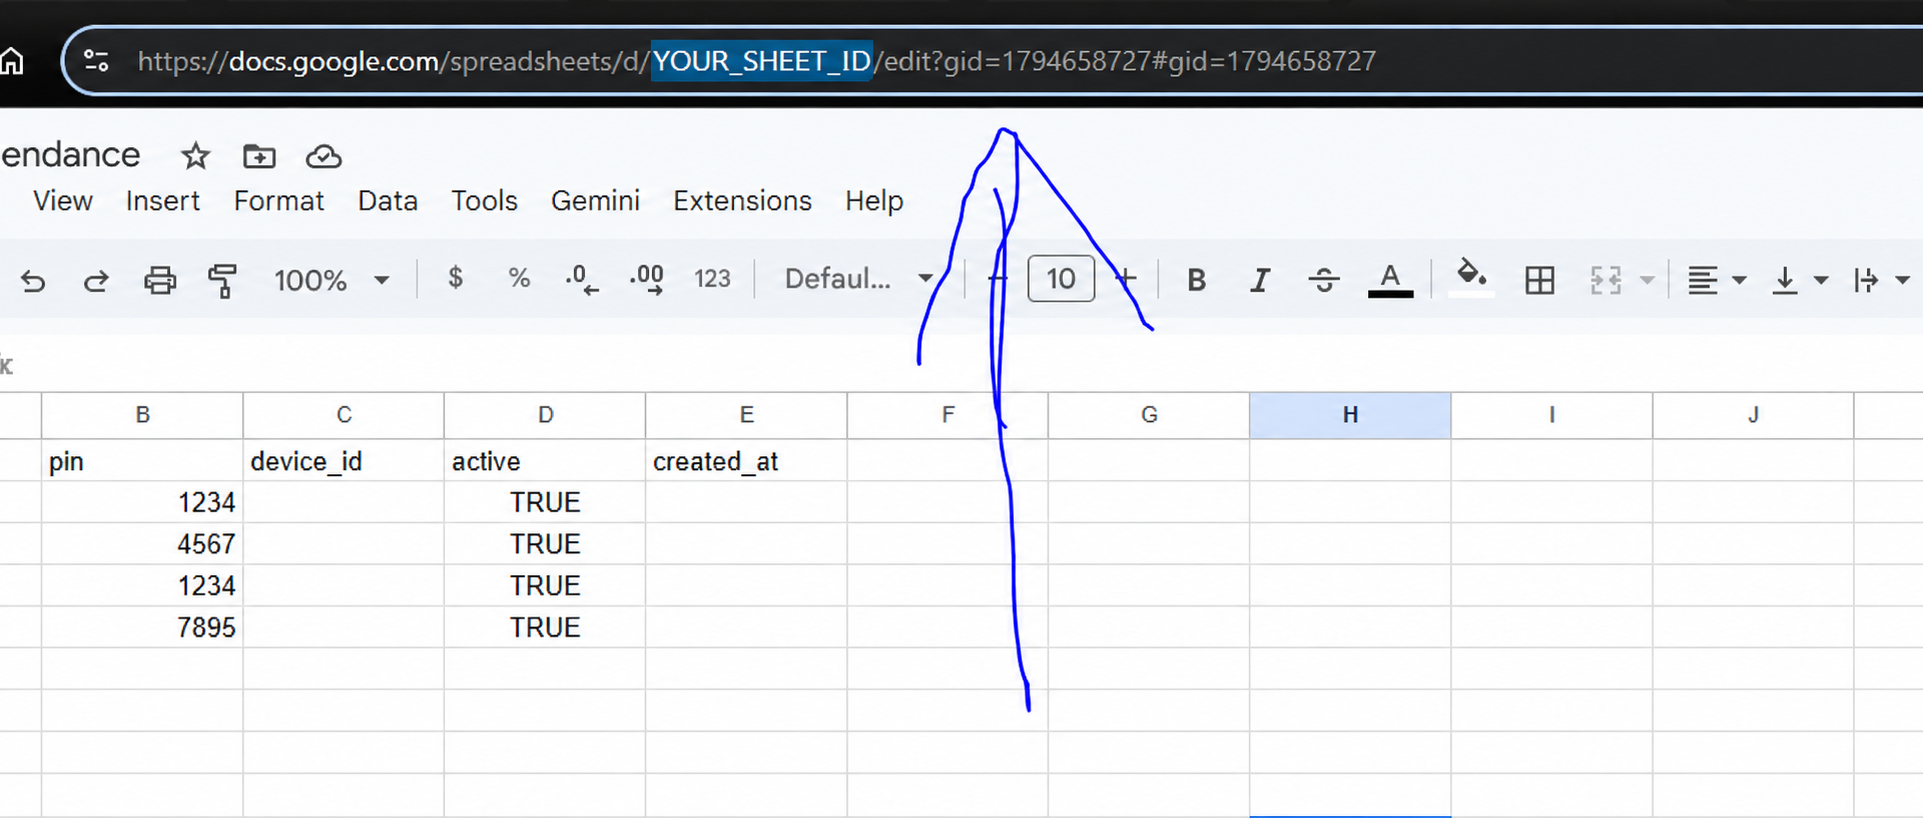
Create one blank Google Sheet. At the bottom, add three tabs with these exact names: Members, Attendance, and Settings.
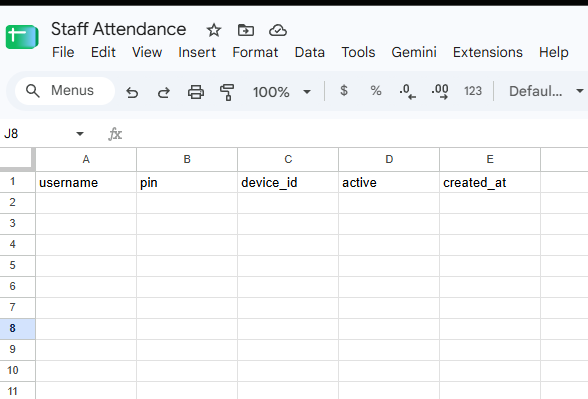
username, pin, device_id, active, created_at.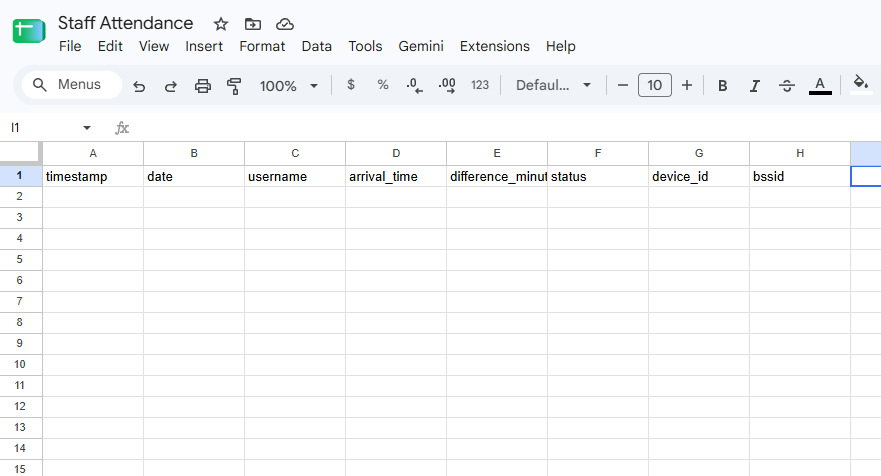
timestamp, date, username, arrival_time, difference_minutes, status, device_id, bssid.key and value. Add one setting per row using the examples in the picture.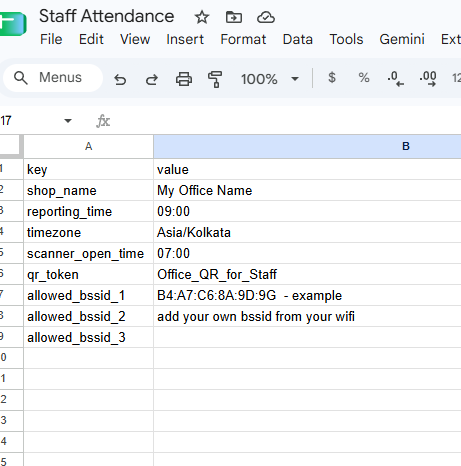
qr_token, write any text or number you choose, for example Office_QR_for_Staff. Then use any QR generator to create a QR containing exactly the same text or number. Do not add spaces or line breaks.- Paste the BSSID into
allowed_bssid_1in Settings. - If the shop has more access points, add them as
allowed_bssid_2andallowed_bssid_3. - Use the colon format, for example
B4:A7:C6:8A:9D:9D. The app and backend accept uppercase or lowercase, but this format is easiest to read.
Open Apps Script and add the backend
Apps Script is Google’s built-in tool that safely connects your Sheet to the QR Attendance app.
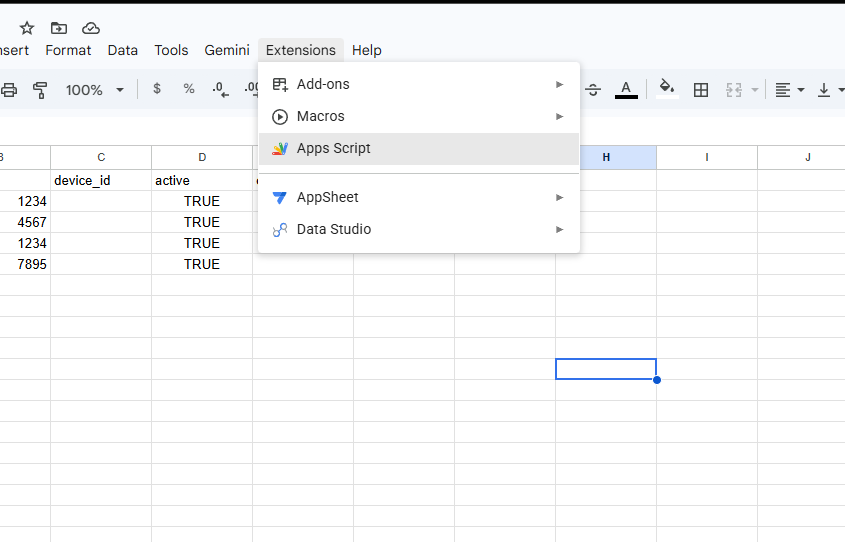
- In your Google Sheet, select Extensions → Apps Script.
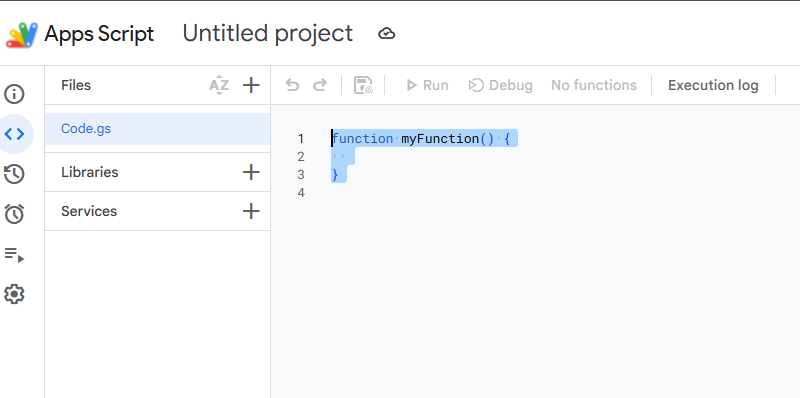
- A new Apps Script project opens with a file called Code.gs.
- Open the supplied Code.gs file below, copy it all, and replace the default code.
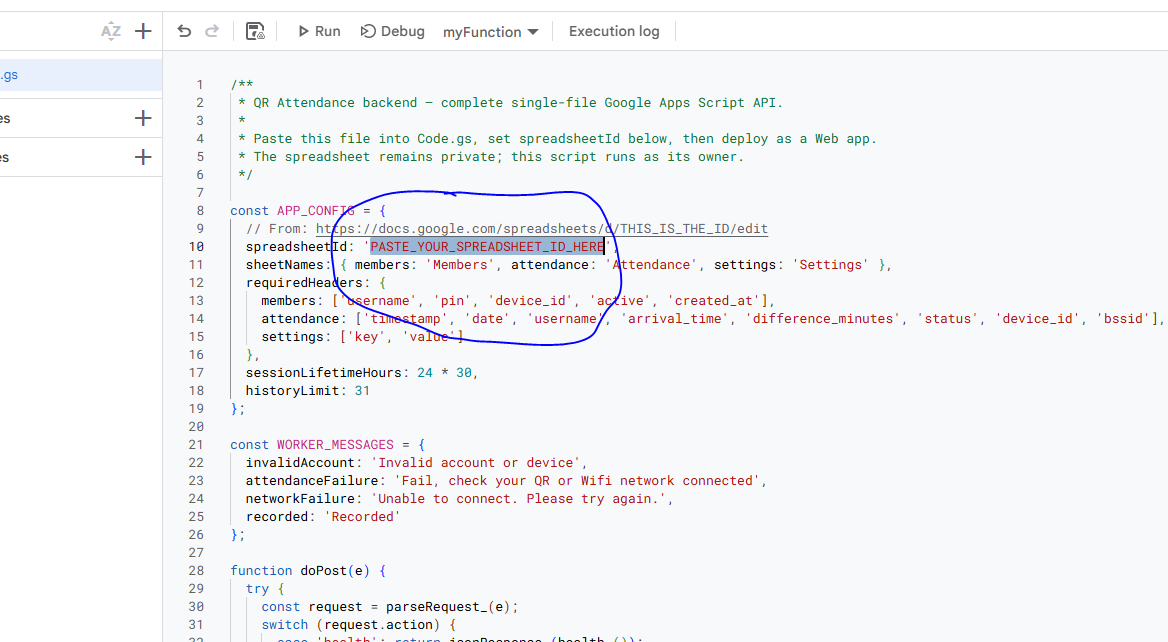
- Inside the code, replace PASTE_YOUR_SPREADSHEET_ID_HERE with the Sheet ID from Step 1.
Deploy and copy your app link
Deploying makes a private connection URL for your QR Attendance app.
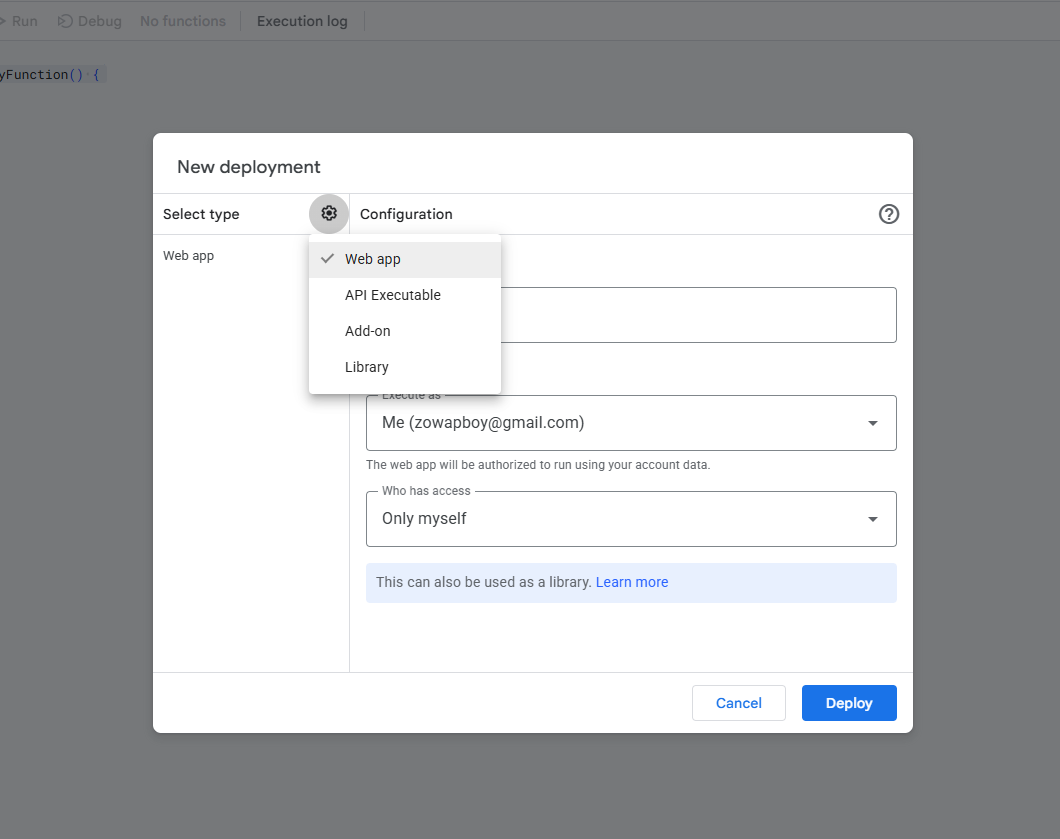
- In Apps Script, click Deploy → New deployment.
- Choose Web app as the type.
- Run as yourself and set access so your staff can use the app link.
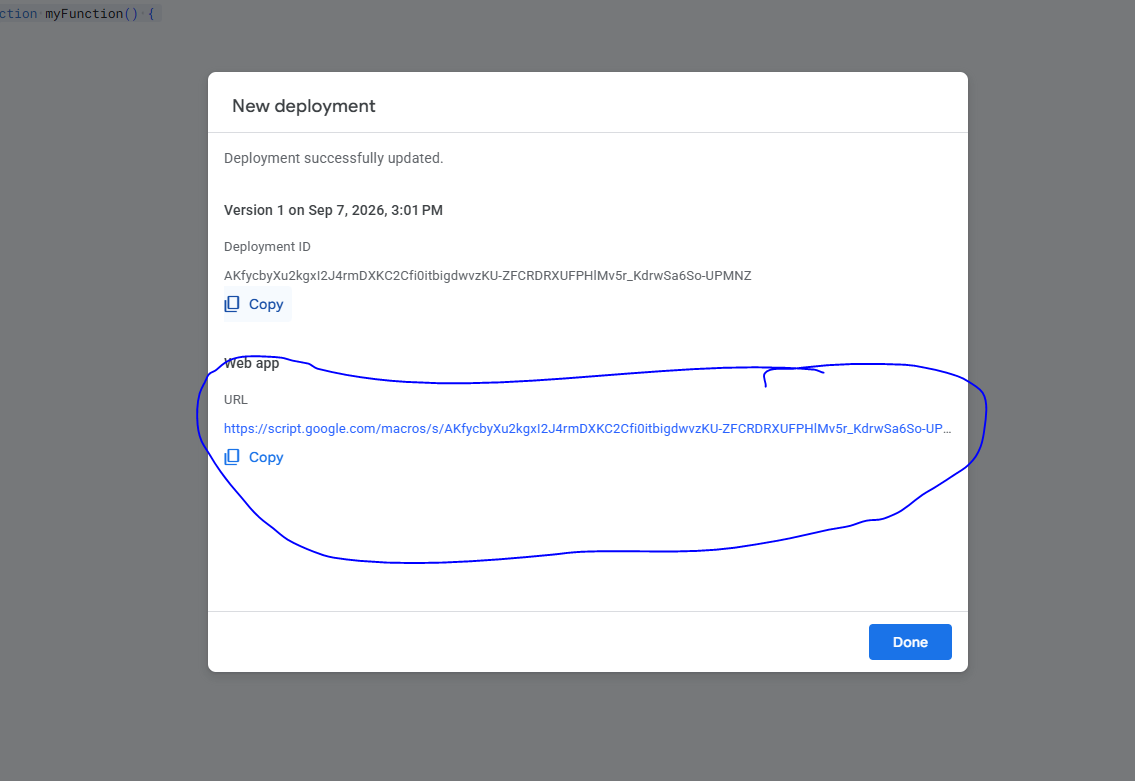
- Click Deploy, allow Google’s permission prompts, then copy the Web app URL ending in /exec.
Managing Members
Keep your staff list accurate from the Members tab. Each row is one login account, and the first successful login connects that account to one phone.
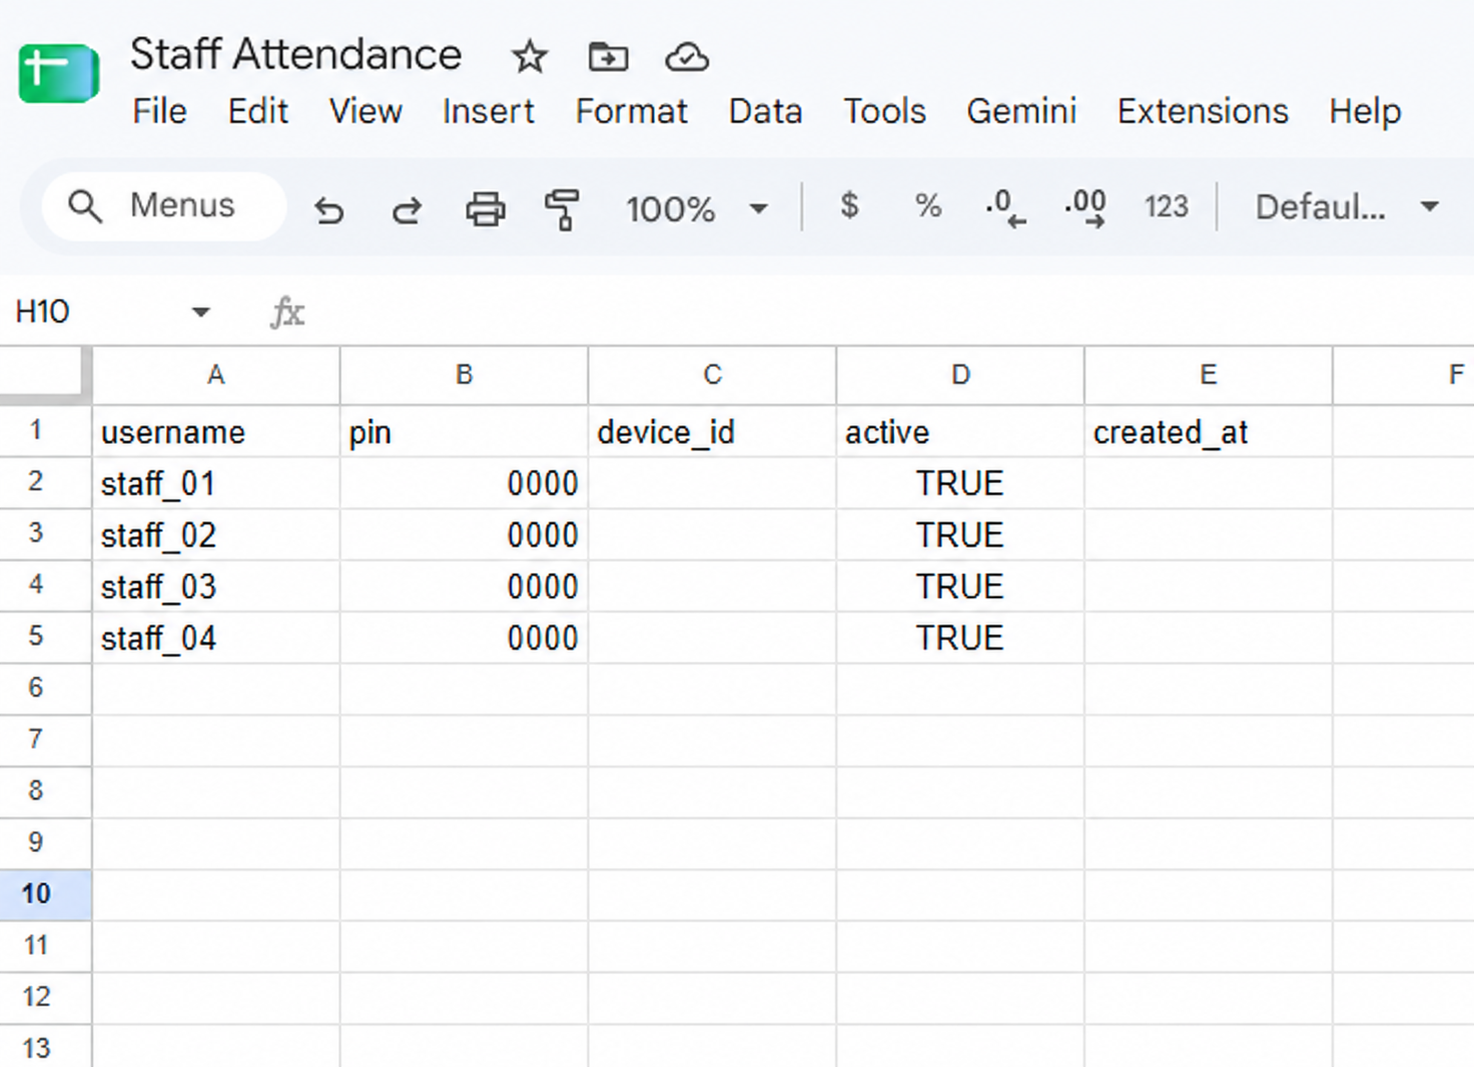
username, pin, device_id, active, created_at.Add a member
- Add a new row.
- Enter a unique username.
- Enter a simple numeric pin.
- Leave device_id empty.
- Set active to TRUE.
Set or change a PIN
- Find the member’s row.
- Edit the number in the pin column.
- Give the new PIN to that member privately.
- No separate display name is needed.
Remove or pause access
- For a temporary block, change active to FALSE.
- To remove the account entirely, delete its whole row.
- Keeping old attendance rows preserves your records.
- Use one unique username per person.
- Use numeric PINs only, with no spaces.
- Do not type a phone’s device ID yourself—the app fills it after first login.
- Use FALSE instead of deleting a row when you may need the account history later.
Connect the QR Attendance app
You are ready. Give staff their username, PIN, and the Web app URL you copied in Step 3.
- Open QR Attendance.
- Paste the Web app URL ending in /exec, then select Save and continue.
- Sign in using the username and numeric PIN from the Members tab.
- At the shop, connect to approved Wi-Fi and scan the printed QR code after the configured opening time.